Tuesday, August 25, 2015

Watercolor Words Hope

We all need hope now and then--sometimes emphasis on the "more."  This card is a loving way to show that---Susie

·
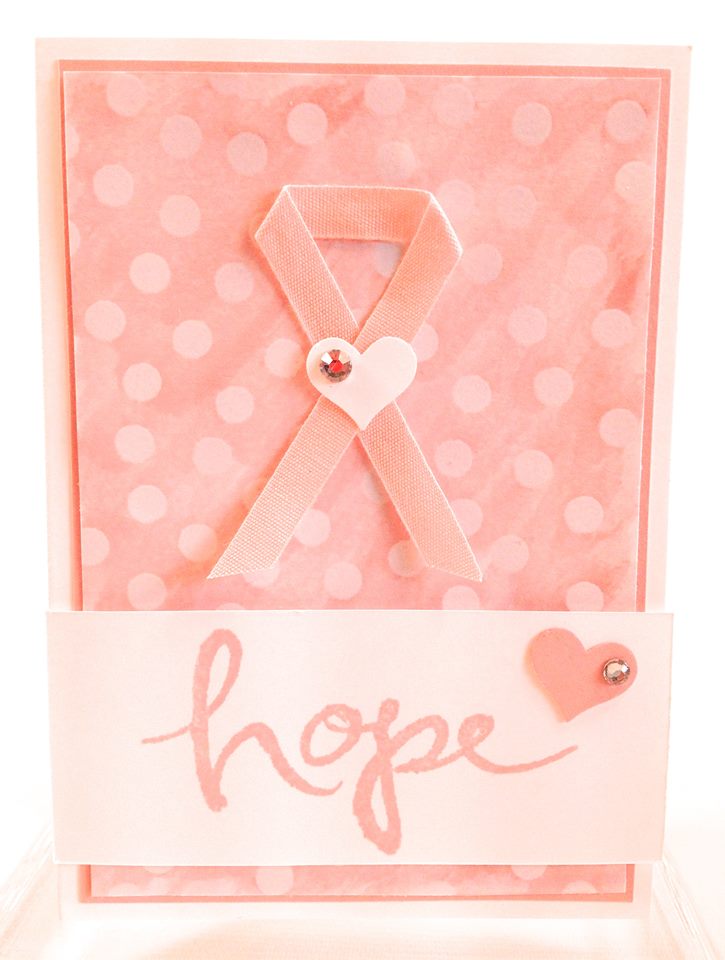
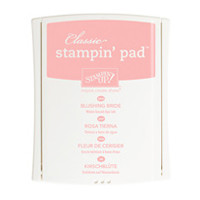
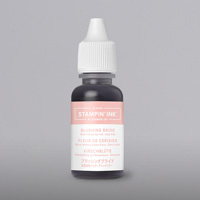
1.    Squeeze some Blushing Bride Re-inker in the lid of the Blushing Bride Ink Pad.  Use Aqua Painter and re-inker to watercolor entire background of Dot DSP layer.  The more water, the lighter the background will be.  The more re-inker, the darker the background will be.  Start with less re-inker…you can always add more, but you can’t re-lighten.
a.    The paper may be a little wet.  Set aside to dry.
2.    Punch one heart from white scrap and one heart from blushing scrap.  Put a rhinestone on each.  Set aside
3.    Create Breast Cancer Awareness Ribbon with Blushing Bride Ribbon, using glue dots to adhere corners and cross section. 
a.    Use Glue Dot to attach White Heart.
b.    Set aside
4.    Stamp “Hope” in Blushing Bride Ink on Whisper White layer.
a.    Use Glue Dot to attach Blushing Bride Heart.
b.    Set aside
5.    Use SNAIL to adhere Blushing Bride Layer to Notecard.
6.    Use SNAIL in center and glue dots around edges to adhere DSP layer (the glue dots will help with the warping from wetting the paper during watercoloring).
7.    Use dimensionals to adhere Hope layer.
8.    Use glue dots to adhere Ribbon


Sunday, August 16, 2015

Embossed Blossoms

Measurements: 
·       Melon Mambo 8-1/2 x 5-1/2, scored at 4-1/4
·       Whisper White 4 x 5-1/4
·       White Vellum Cardstock scraps
  
Instructions: 
1.    Stamp greeting on card front where shown with Melon Mambo ink
2.    Using VersaMark ink - stamp flower clusters on Whisper White layer
3.    Emboss with White Stampin’ Emboss Powder and heat Tool
4.    Sponge Melon Mambo ink over embossed flower clusters and up the left side of the Whisper White layer as shown on card
5.    Using VersaMark ink - stamp three flowers on White Vellum Cardstock - emboss with White Embossing Powder and Heat Tool - punch with Pansy Punch
6.    Adhere flowers to card front with Dimensionals
7.    Adhere to card front

8.    Enjoy!


Wednesday, August 12, 2015

Remarkable You

School's back in session and sadly my stamping time is reduced.  Here's a beautiful and simple card to make that reminds me that it's still beautiful outside even if I'm inside with 6th graders!
Supplies:
            Remarkable You stamp set – Clear #139894
            English Garden Designer Series Paper - #138440
            Whisper White card stock – #100730
            Basic Black card stock – #121045
            Memento ink pad – #132708
            Blender Pens – #102845
            Soft Sky ink pad – #131181
            Old Olive ink pad – #126953
            Linen Thread – #104199
            Stampin’ Dimensionals – #104430
Measurements:
Old Olive card stock base:  8.5” X 5.5”
Designer Paper:  5 ¼” X 4” (then cut off 2” and flip to show the opposite side of
the paper)
Basic Black mat:  3 1/8” X 4 7/8”
Whisper White (piece to stamp on):  3” X 4 ¾”.
Instructions:
·       Cut the Old Olive card stock base and fold in half.
·       Cut the green leaf piece of designer paper to 5 ¼” X 4” then cut on the 5 ¼” inch side at 2”.  Flip this piece over and adhere both pieces to the card stock base.
·       Stamp the You are Remarkable sentiment using the Memento ink on the Whisper White piece of card stock.
·       Stamp leaf image using Memento ink above the sentiment.  If you notice that the stem is too long, place a sticky note over the stamped sentiment then stamp the leaf image (this is a mask and will make sure that the stem doesn’t stamp over the words). 
·       Color in the leaves using a blender pen.  Use a little bit of Soft Sky ink first on each leaf then go back and highlight using the Old Olive.
·       Adhere this piece to the black mat and add several layers of linen thread.  Tie a bow on the front.
·       Adhere to the front of the card using dimensionals.